RECIPES
Welcome to my collection of easy to follow and relaxing recipes. If you are feeling overwhelmed and looking for something to take your mind off the trickier things in life, you are in the right place.
Keep popping back as I shall be regularly adding more of my favourites
Quick and Easy
Crusty Loaf
Next time you are in the supermarket, check out the list of ingredients in a loaf of bread. Shocking isn't it. This quick and easy gorgeous loaf has just four ingredients, yes FOUR! And before you ask, there is minimum faffage and it tastes amazing.
INGREDIENTS
400g white bread flour
2 tsp yeast
2 tsp salt
300ml warm water
Dutch oven or cast iron casserole dish
METHOD
Mix all the ingredients together in a large bowl, using a wooden spoon, no need to knead.
Cover with a clean tea towel and place in a warm place for 2-3 hours until increased in size and looks nice and puffy.
Preheat the oven to 230 degrees (210 degrees fan) Gas mark 8 and place your oven or dish in to preheat for 30 minutes.
Once the dough is ready, shape it into a neat round, place on baking parchment and carefully lower into the pot and place in the oven. Spritz water into the oven to create steam.
Bake with the lid on for 25 minutes then with the lid off for 10-15 minutes
Pineapple Upside Down Pudding
Growing up in the 1970's, there probably wasn't a household without a tin of pineapple rings in the cupboard. This retro recipe is from one of my school cookery exercise books - thank you Mrs Link - and was one of the first things I regularly made for my family. My dad had a massive sweet tooth so this always makes me think of him. So if you are planning a summer barbecue and want a tropical flavour, this is for you.
INGREDIENTS
100g & 15g unsalted butter
100g caster sugar
100g self raising flour
2 eggs
50g golden syrup
can of pineapple rings - drained
3 or 4 glace cherries
8" round Victoria sandwich tin
METHOD
Heat the oven to Gas mark 4/180 degrees (or 160 degrees fan)
Grease or line tin and arrange pineapple rings with one central the the others around.
Cut cherries in half and place cut side up in the centre of each pineapple ring.
Melt 15g of butter and the golden syrup in a small pan over a gentle heat then pour over the pineapple and cherries.
Cream 100g of butter and caster sugar together until smooth.
Whisk the eggs and add to the butter and sugar.
Fold in the flour.
Gently smooth this mixture over the pineapple rings, spread out to the edges of the tin.
Bake in the middle of the oven for around 40 minutes (check after 35) until the sponge springs back to the touch.
Leave to cool for 5 minutes then turn out onto a plate.
Perfect served warm with ice-cream or cold too (if you can wait that long).
Rocky Road
Rocky road is one of those treats that feels like pure nostalgia in every bite.
It’s a wonderfully messy mix of smooth, melted chocolate, soft pillowy marshmallows, and crunchy biscuit, all tangled together into something irresistibly moreish.
There’s no need for perfection here, the charm is in its rough, “rocky” look and the surprise of different textures in every chunk.
It’s the kind of treat you can throw together in minutes but still feels indulgent enough to share (or keep all to yourself to have with your next cuppa).
INGREDIENTS
150 g unsalted butter
50 g dark chocolate , Chopped
350 g milk chocolate
80g golden syrup
To stir in:
200 g mini marshmallows
200 g digestive biscuits, crushed into chunks
METHOD
Add your butter , syrup and chocolate to a saucepan and melt over a very LOW heat.
Leave to cool for a little while.
Add your fillings:
Add the marshmallows, keeping a few back for placing on the top, and the digestive biscuits, stir until everything is well coated.
Line a 20cm x 20cm baking tin with baking paper and press the mixture firmly in.
Allow to set in the fridge for 2-3 hours.
Turn out of the tin and cut into small chunks using a very sharp knife.
Ingredients
50g salted butter
50g golden syrup
50g plain flour
50g glacé cherries (chopped)
50g sultanas
75g flaked almonds
50g pistachios chopped
1 orange (zested)
175g milk chocolate
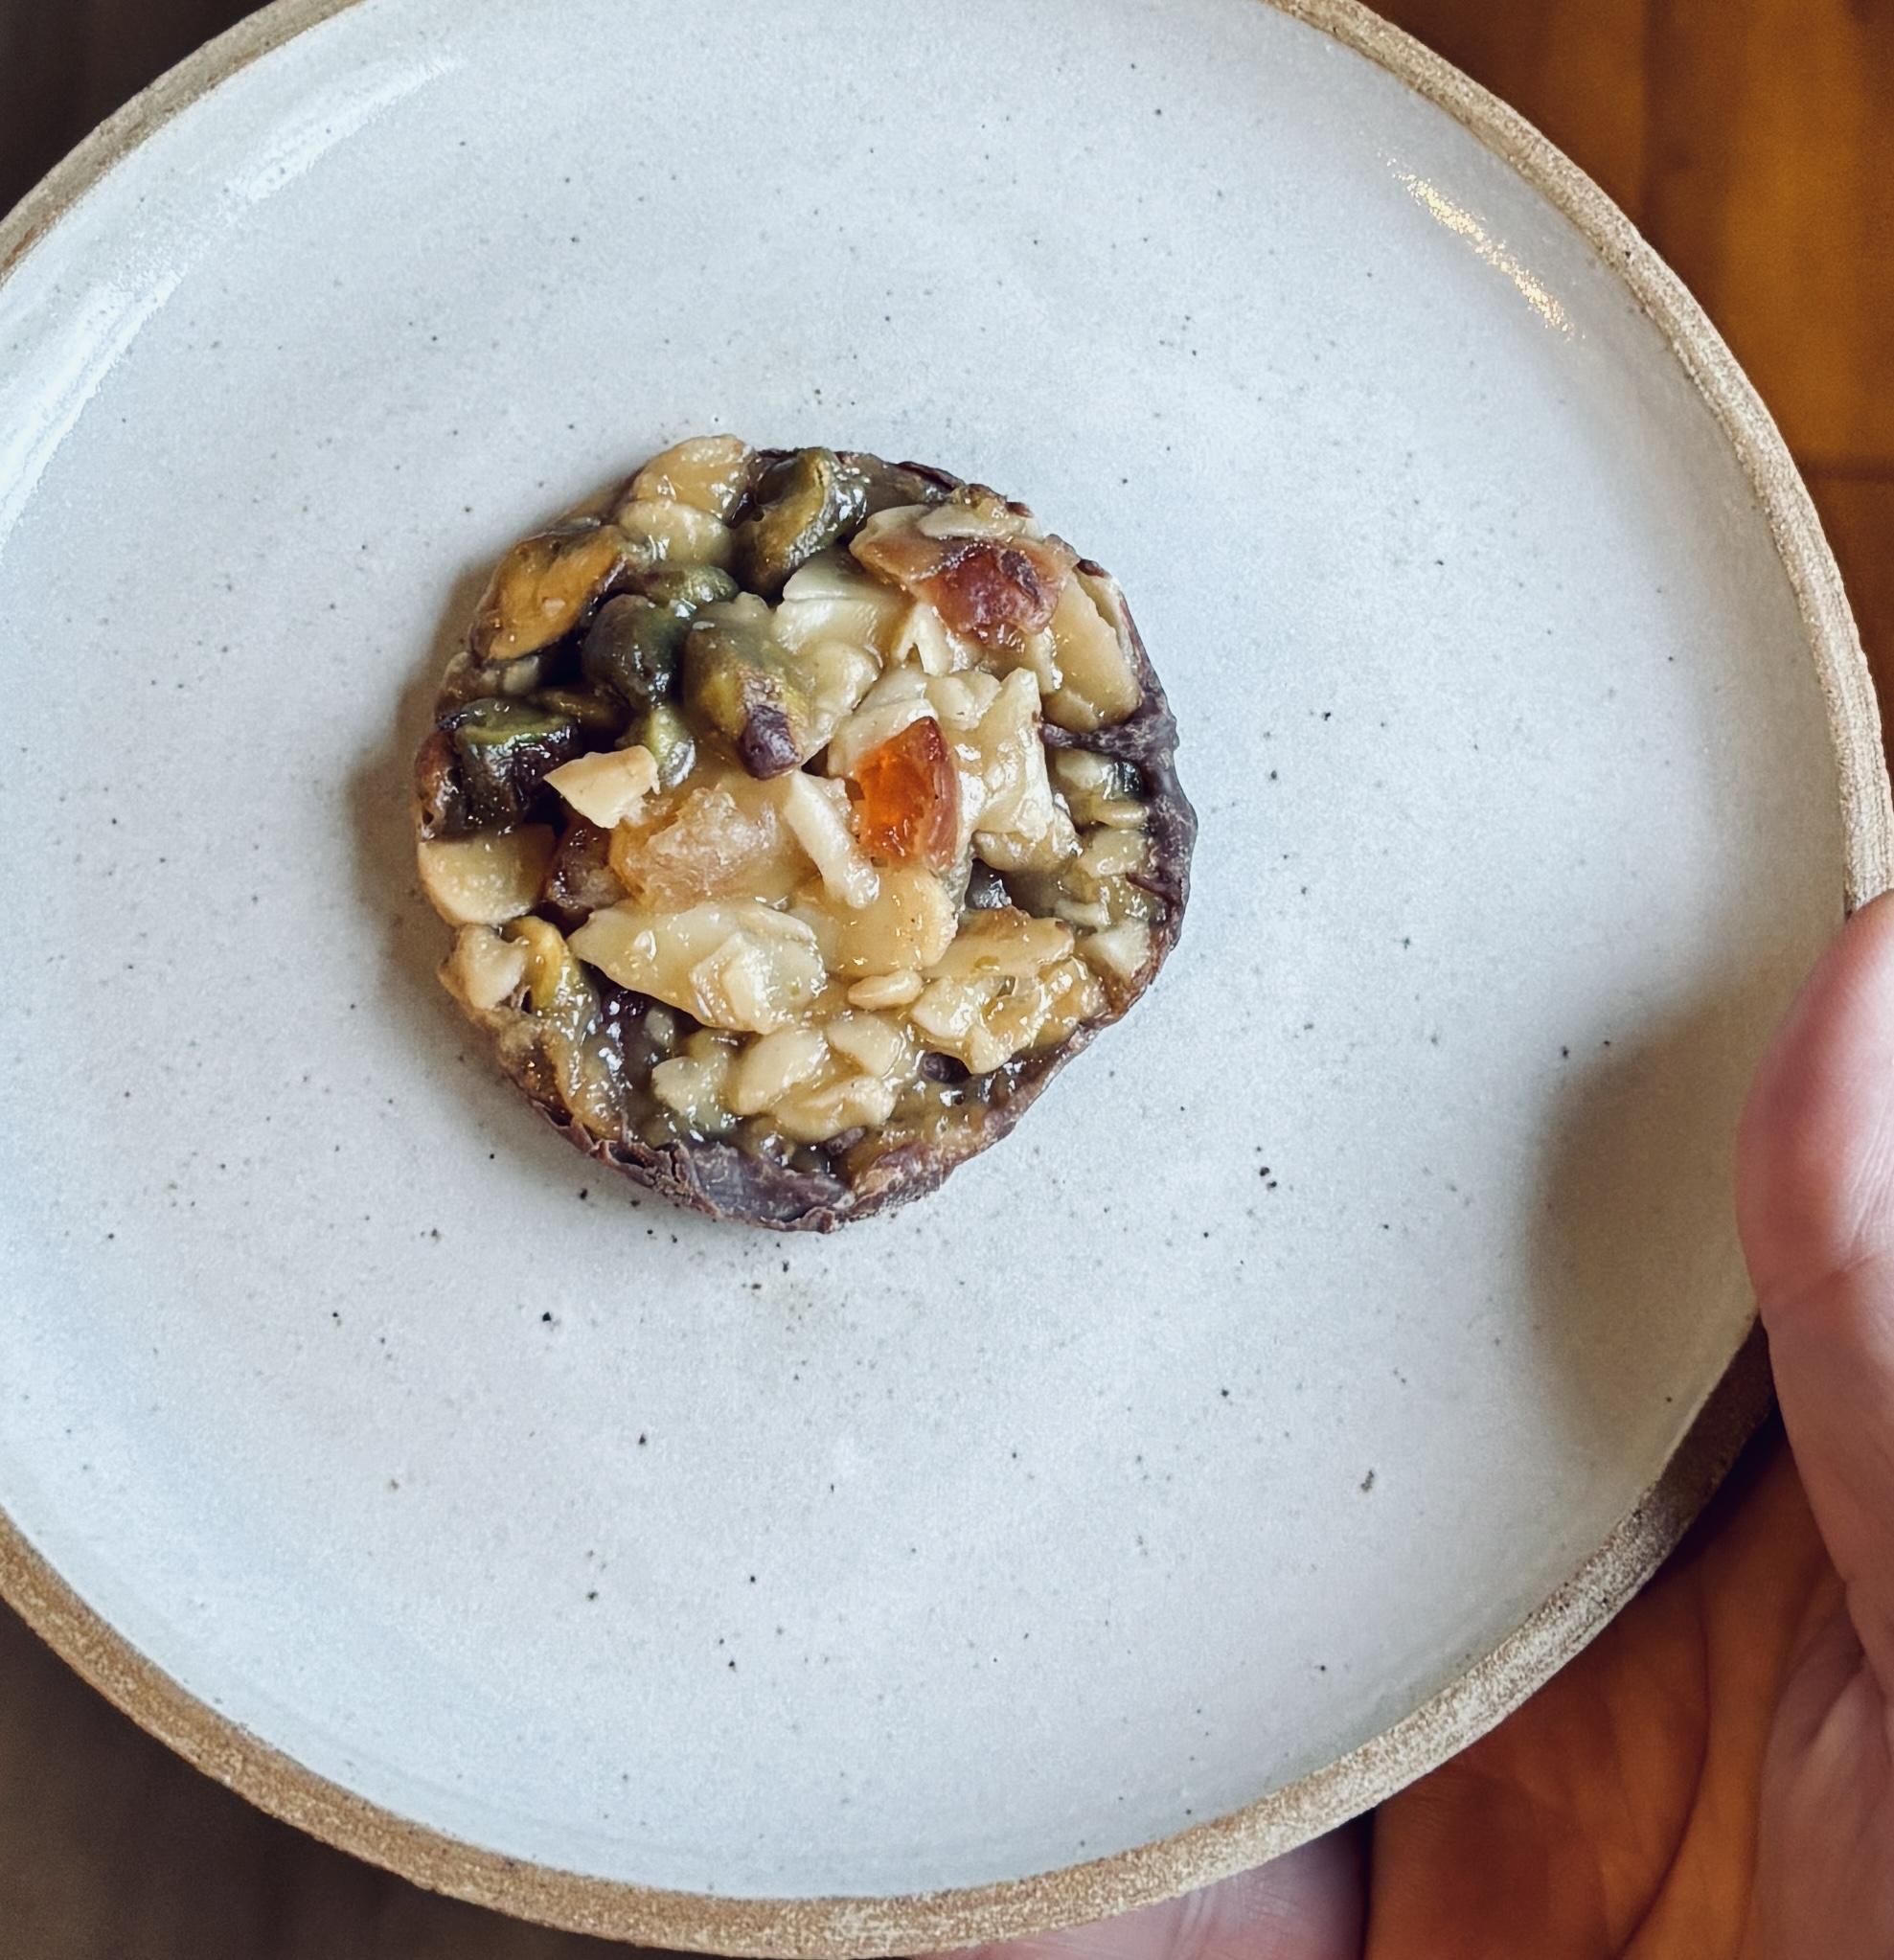
Florentine Biscuits
Simple to make but oh so pretty, the Florentine is popular as a European Christmas treat, but I think they are perfect for any time of year - especially as an after dinner treat with a cup of coffee.
As for their origin, you would be forgiven for thinking they came from Florence, but they are not even Italian! Instead, we can thank 17th century pastry chefs at the Palace of Versailles, who designed them in honour of Catherine de Medici, who did actually orginate from Florence.
But enough history, lets get on and make some.
Method
Preheat the oven to 180 degrees c (160 degrees c fan) or Gas 4. Line two rectangular baking sheets.
Melt the butter, sugar and golden syrup in a small saucepan over a low heat, stirring frequently. Remove from the heat and whisk in the flour then add the cherries, flaked almonds, pistachios, candied peel and orange zest.
Scoop 10 flat tbsp of the mixture onto the baking sheets, leaving room for them to spread. You will need to do these in batches. Bake for 10 mins until golden. They will have spread, but you can re-shape to a round whilst they're warm, using the edge of the cicular cutter.
Leave to cool for 2 mins until firm enough to lift onto a wire cooling rack. Cool completely. Repeat with the remaining mixture.
Melt the chocolate in a bowl over a simmering saucepan of water or in the microwave in 30 second bursts, stirring in between. Holding the biscuits carefully by the edge, lower the base into the chocolate, tapping on the side of the bowl to remove drips. Place chocolate side up onto a wire cooling rack. Leave to set and then store in an airtight container.
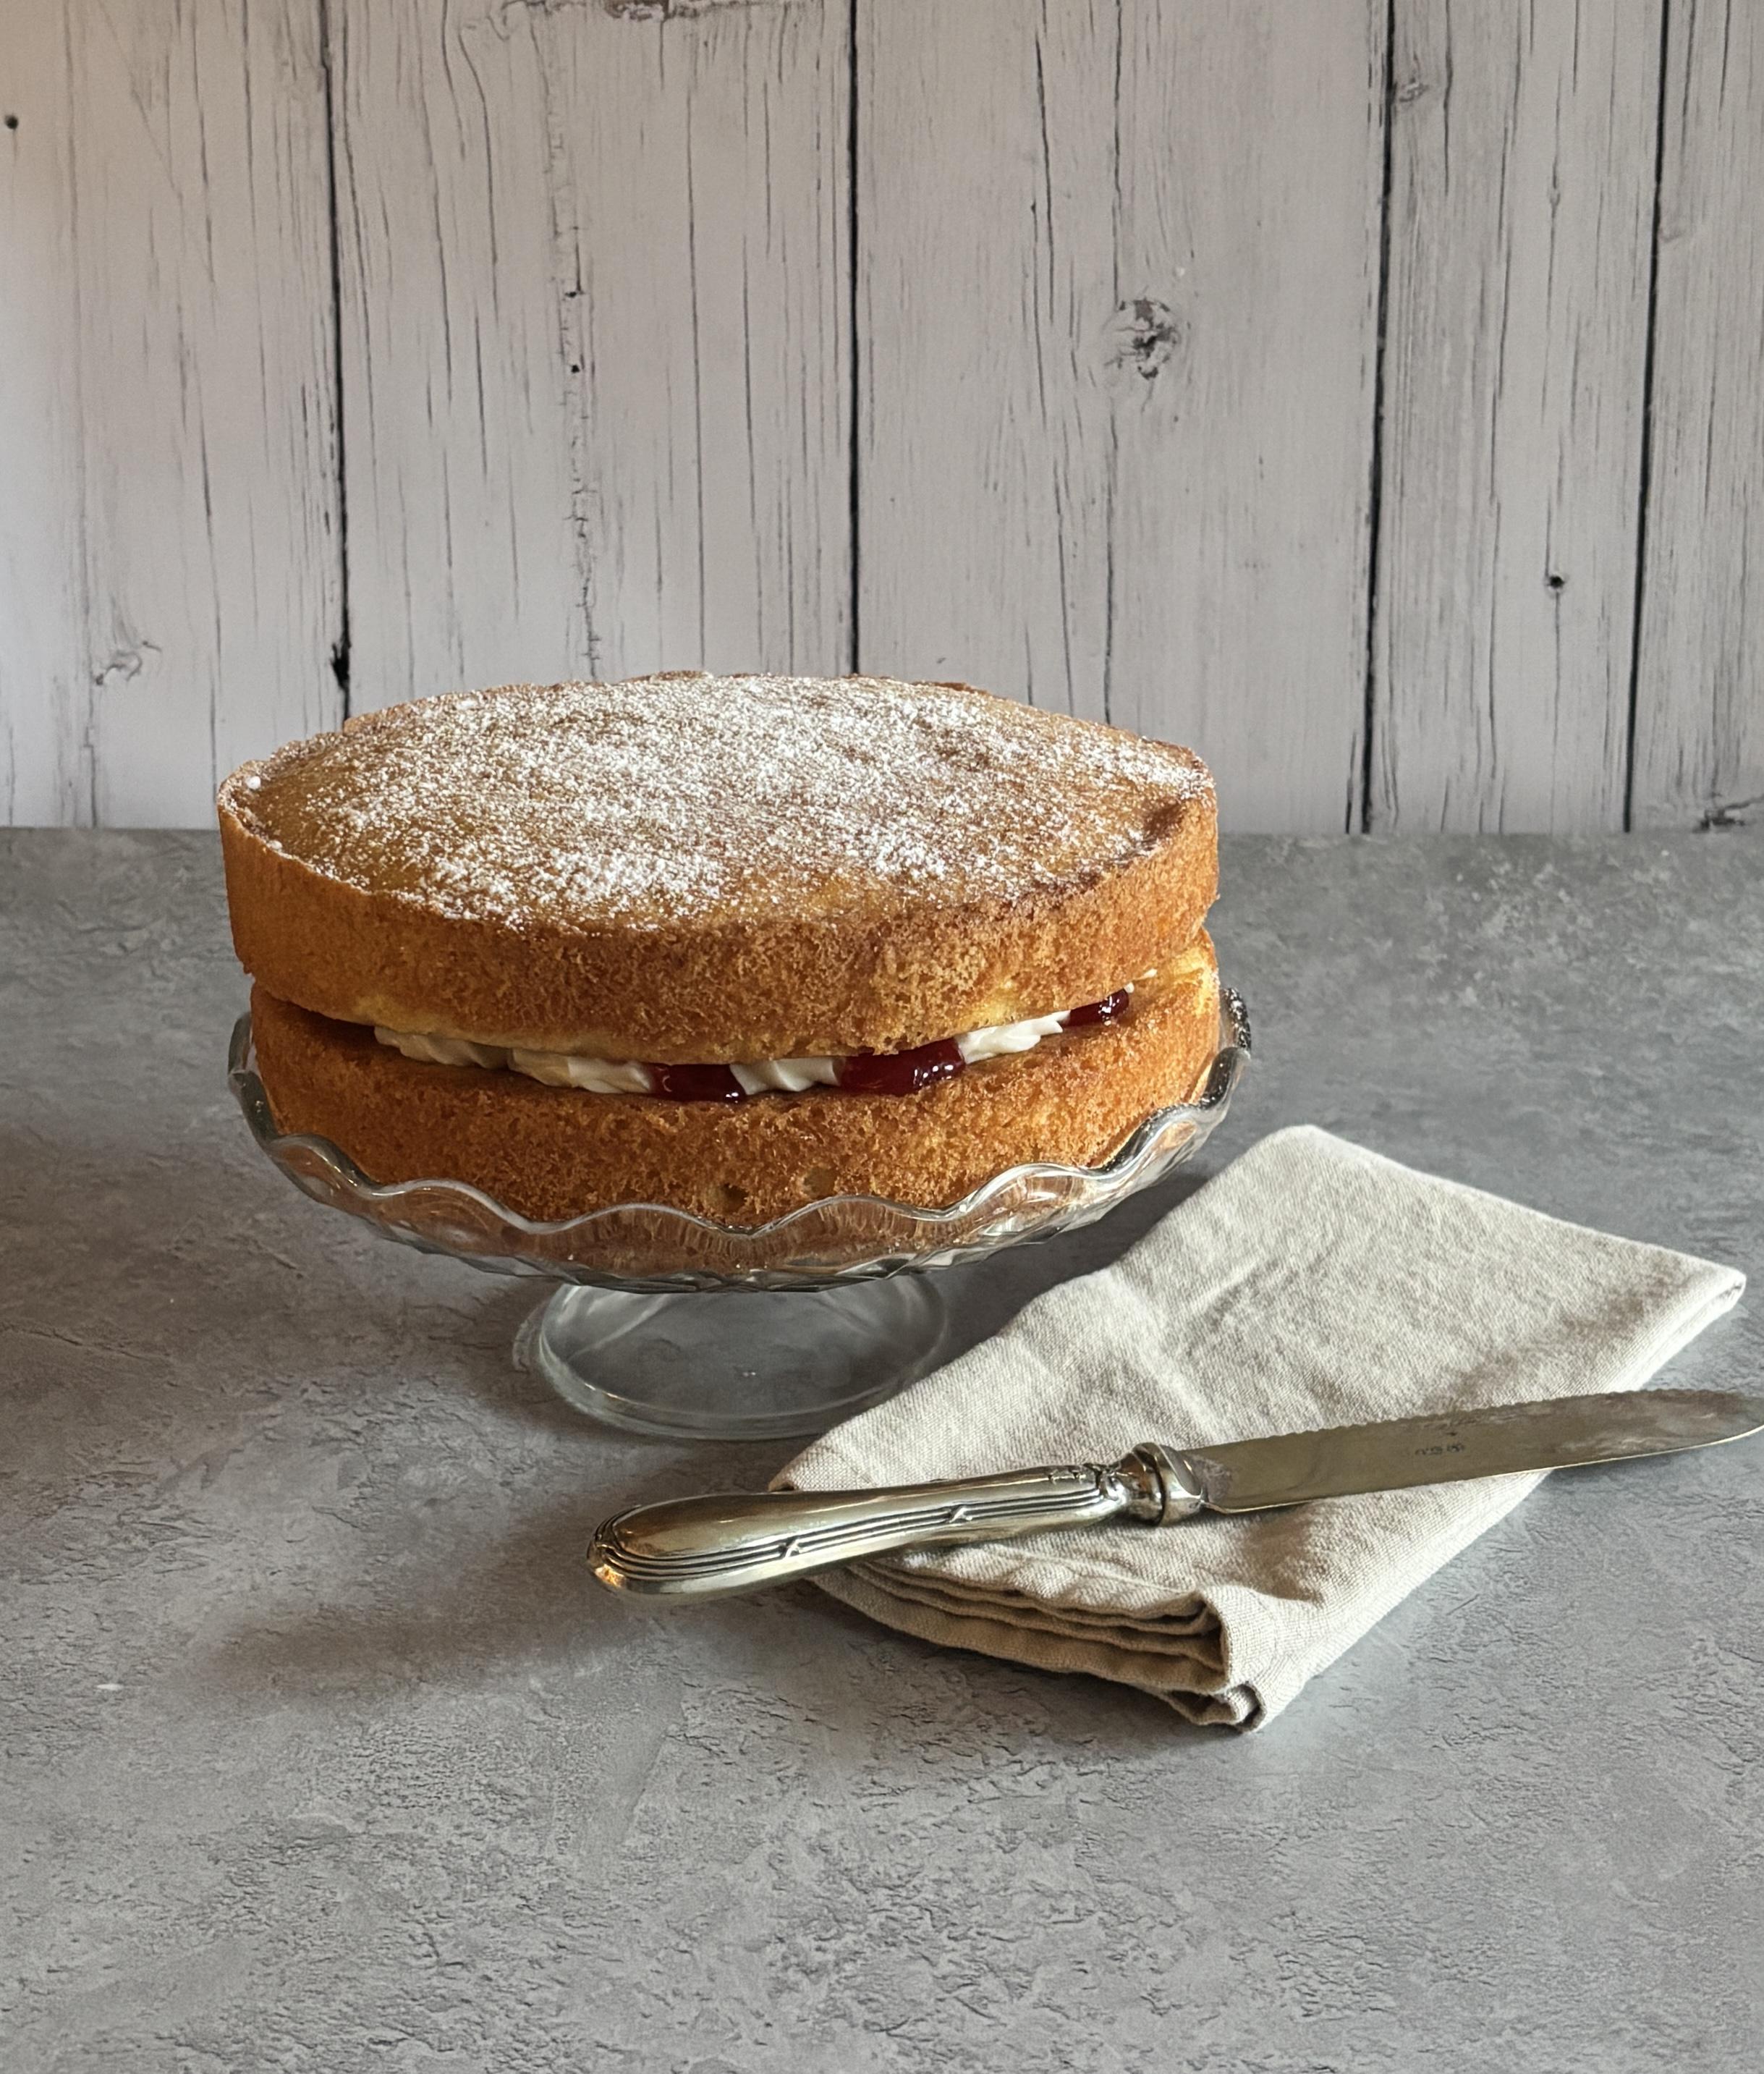
Victoria Sandwich
The cake that we all know and most love, I would suggest this as your first step into the world of baking.
Named after Queen Victoria, who favoured this extremely light cake with her afternoon tea in the mid 19th century.
It capitalised on the invention of baking powder, creating a light airy texture. Traditionally filled with strawberry jam and cream and dusted with sugar – what’s not to love.
The recipe has pretty much remained unchanged for all those years, this is my version from one of my 1970s cookery lessons.
Ingredients
4 medium eggs
225g caster sugar
225g butter or margarine – room temperature
225g self-raising flour
1 teaspoon baking powder
Filling
Jam - strawberry is traditional but anything goes.
Fresh sliced strawberries are a nice alternative to jam.
A pot of double or whipping cream or buttercream.
Method
Preheat the oven to 180 degrees c (160 degrees c fan) or Gas 4. Grease and line two 20cm/8in sandwich tins.
Break the eggs into a bowl and whisk gently together.
Place the sugar and butter into another bowl and cream together until light and fluffy – you can do this by hand with a wooden spoon, or using an electric hand mixer. Add the eggs and mix well.
Finally add the flour and baking powder and fold in gently – don’t over mix. The finished mixture should fall off a spoon easily.
Divide the mixture evenly between the tins: this doesn’t need to be exact, but you can weigh the filled tins if you want to check. Use a spatula to get all of the mixture from the bowl and gently smooth the surface of the cakes.
Bake the cakes on the middle shelf of the oven for 25 minutes. Check them after 20 minutes just in case. The cakes are done when they’re golden-brown and coming away from the edge of the tins. Press them gently to check – they should be gorgeously springy to the touch.
Set aside to cool in their tins for 5 minutes. Run a rounded knife around the inside edge of the tins and carefully turn the cakes out onto a cooling rack.
To add the finishing touch to your masterpiece, place one cake upside down onto a plate and spread it with plenty of whipped cream or buttercream, then top this with some fruity jam – strawberry is traditional but if you’re feeling rebellious, go for raspberry.
Top with the second cake, top-side up. Sprinkle over with caster sugar or icing sugar.
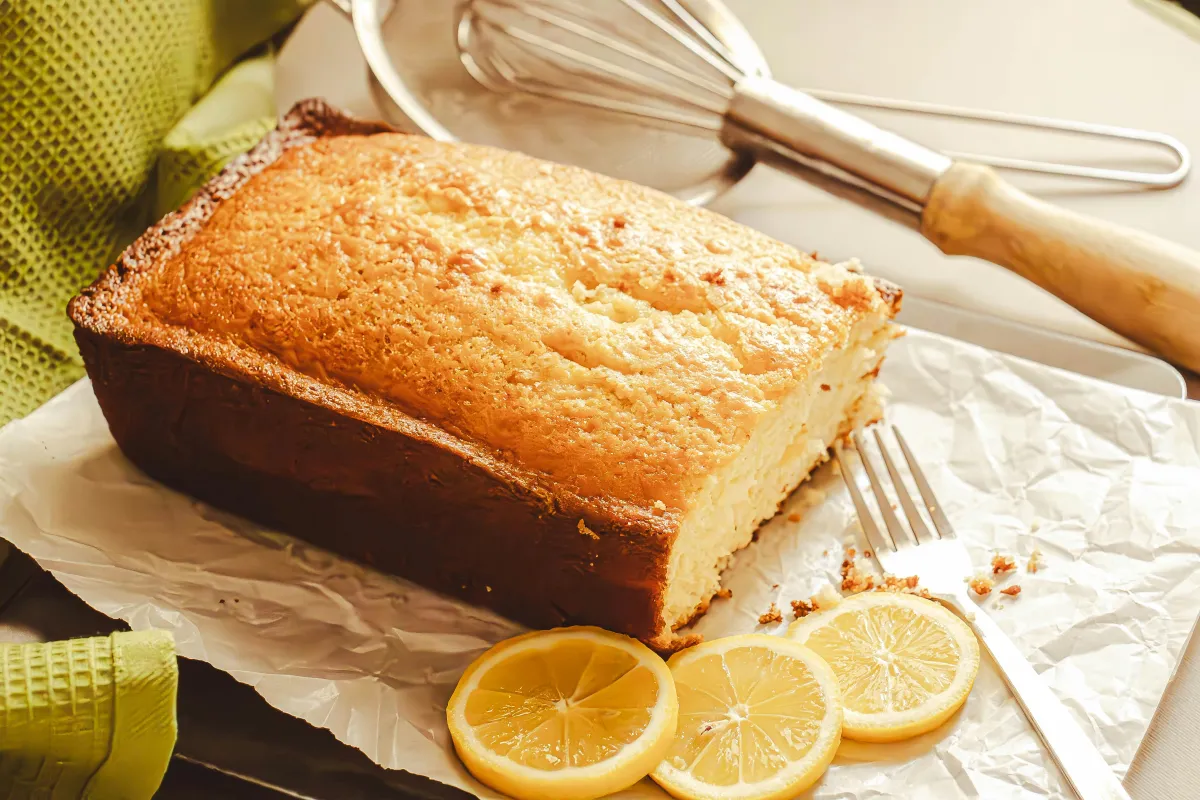
Lemon Drizzle Cake
When someone tells me they can't bake I want to hug them and tell them they really can if they want to. If you can read and own scales then you can bake.
I would say, however, that you should start simple and work your way your way up to something more tricky.
But fear not, simple does not mean boring. Take this lemon drizzle cake, it looks good enough for a National Trust tea room, tastes amazing and takes very little time.
Ingredients
175g caster sugar
175g self-raising flour
175g butter (soft)
3 medium eggs
Finely grated zest of one lemon
3/4 tsp baking powder
For the lemon drizzle topping
100g granulated sugar
Juice of one lemon
Method
Preheat the oven to 180c (160c fan or Gas 4)
Grease and line a 2lb loaf tin - make sure the baking paper is higher than the sides of the tin as this will make it easier to lift out.
Break the eggs into a bowl and whisk.
Place all of the ingredients into a large bowl and, using an electric hand whisk, beat together until smooth. You can do this by hand if you don't have an electric whisk, but it will obviously take longer.
Pour the batter into the prepared cake tin and place on the middle shelf of the oven. Bake for around 40 minutes or until golden brown and it bounces back when you touch it.
While the cake is in the oven, make the drizzle topping by mixing the granulated sugar and lemon juice. When the cake is out of the oven and still warm, carefully spoon the mixture over the top.
Once the cake is cool, lift out of the baking tin and enjoy.
Ingredients
3 eggs plus 2 eggs yolks
225g caster sugar
Finely grated zest of 3-4 lemons
180ml freshly squeezed lemon juice
A pinch of salt
150g cold butter - cubedThis is a Paragraph Font
Method
Whisk the eggs, egg yolks, sugar, zest and lemon juice together in a bowl.
Add the salt and stir.
Place the mixture into a heavy based saucepan over a low heat, whisking.
Gradually add the butter cubes, a few at a time, until they are all melted.
The mixture will start to thicken a little, make sure the egg does not scramble and it doesn't start to boil.
Take off the heat and strain through a fine metal sieve.
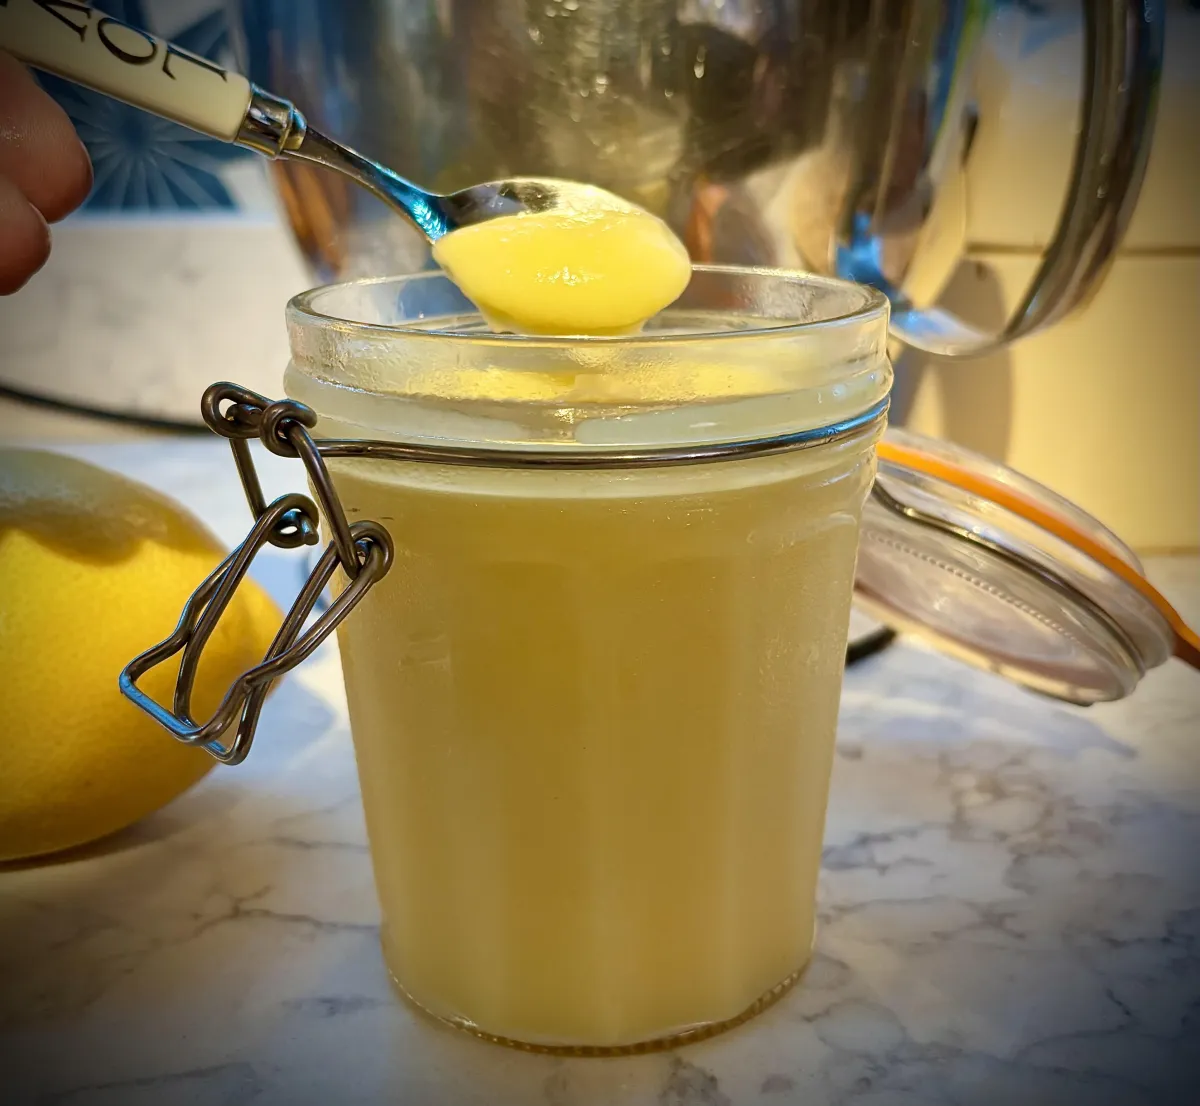
Place in a sterilised jar* and place in the fridge.
Makes one large or two smaller jars and will keep well in the fridge for a couple of weeks (if it lasts that long).
*Jars can easily be sterilised. Once washed thoroughly in hot soapy water, you can either boil them in water for 10-15 minutes, place them in a preheated oven (Gas 3/160 degrees c) for 15 minutes or microwave for 60 seconds. Lids can be boiled separately for 10 minutes.
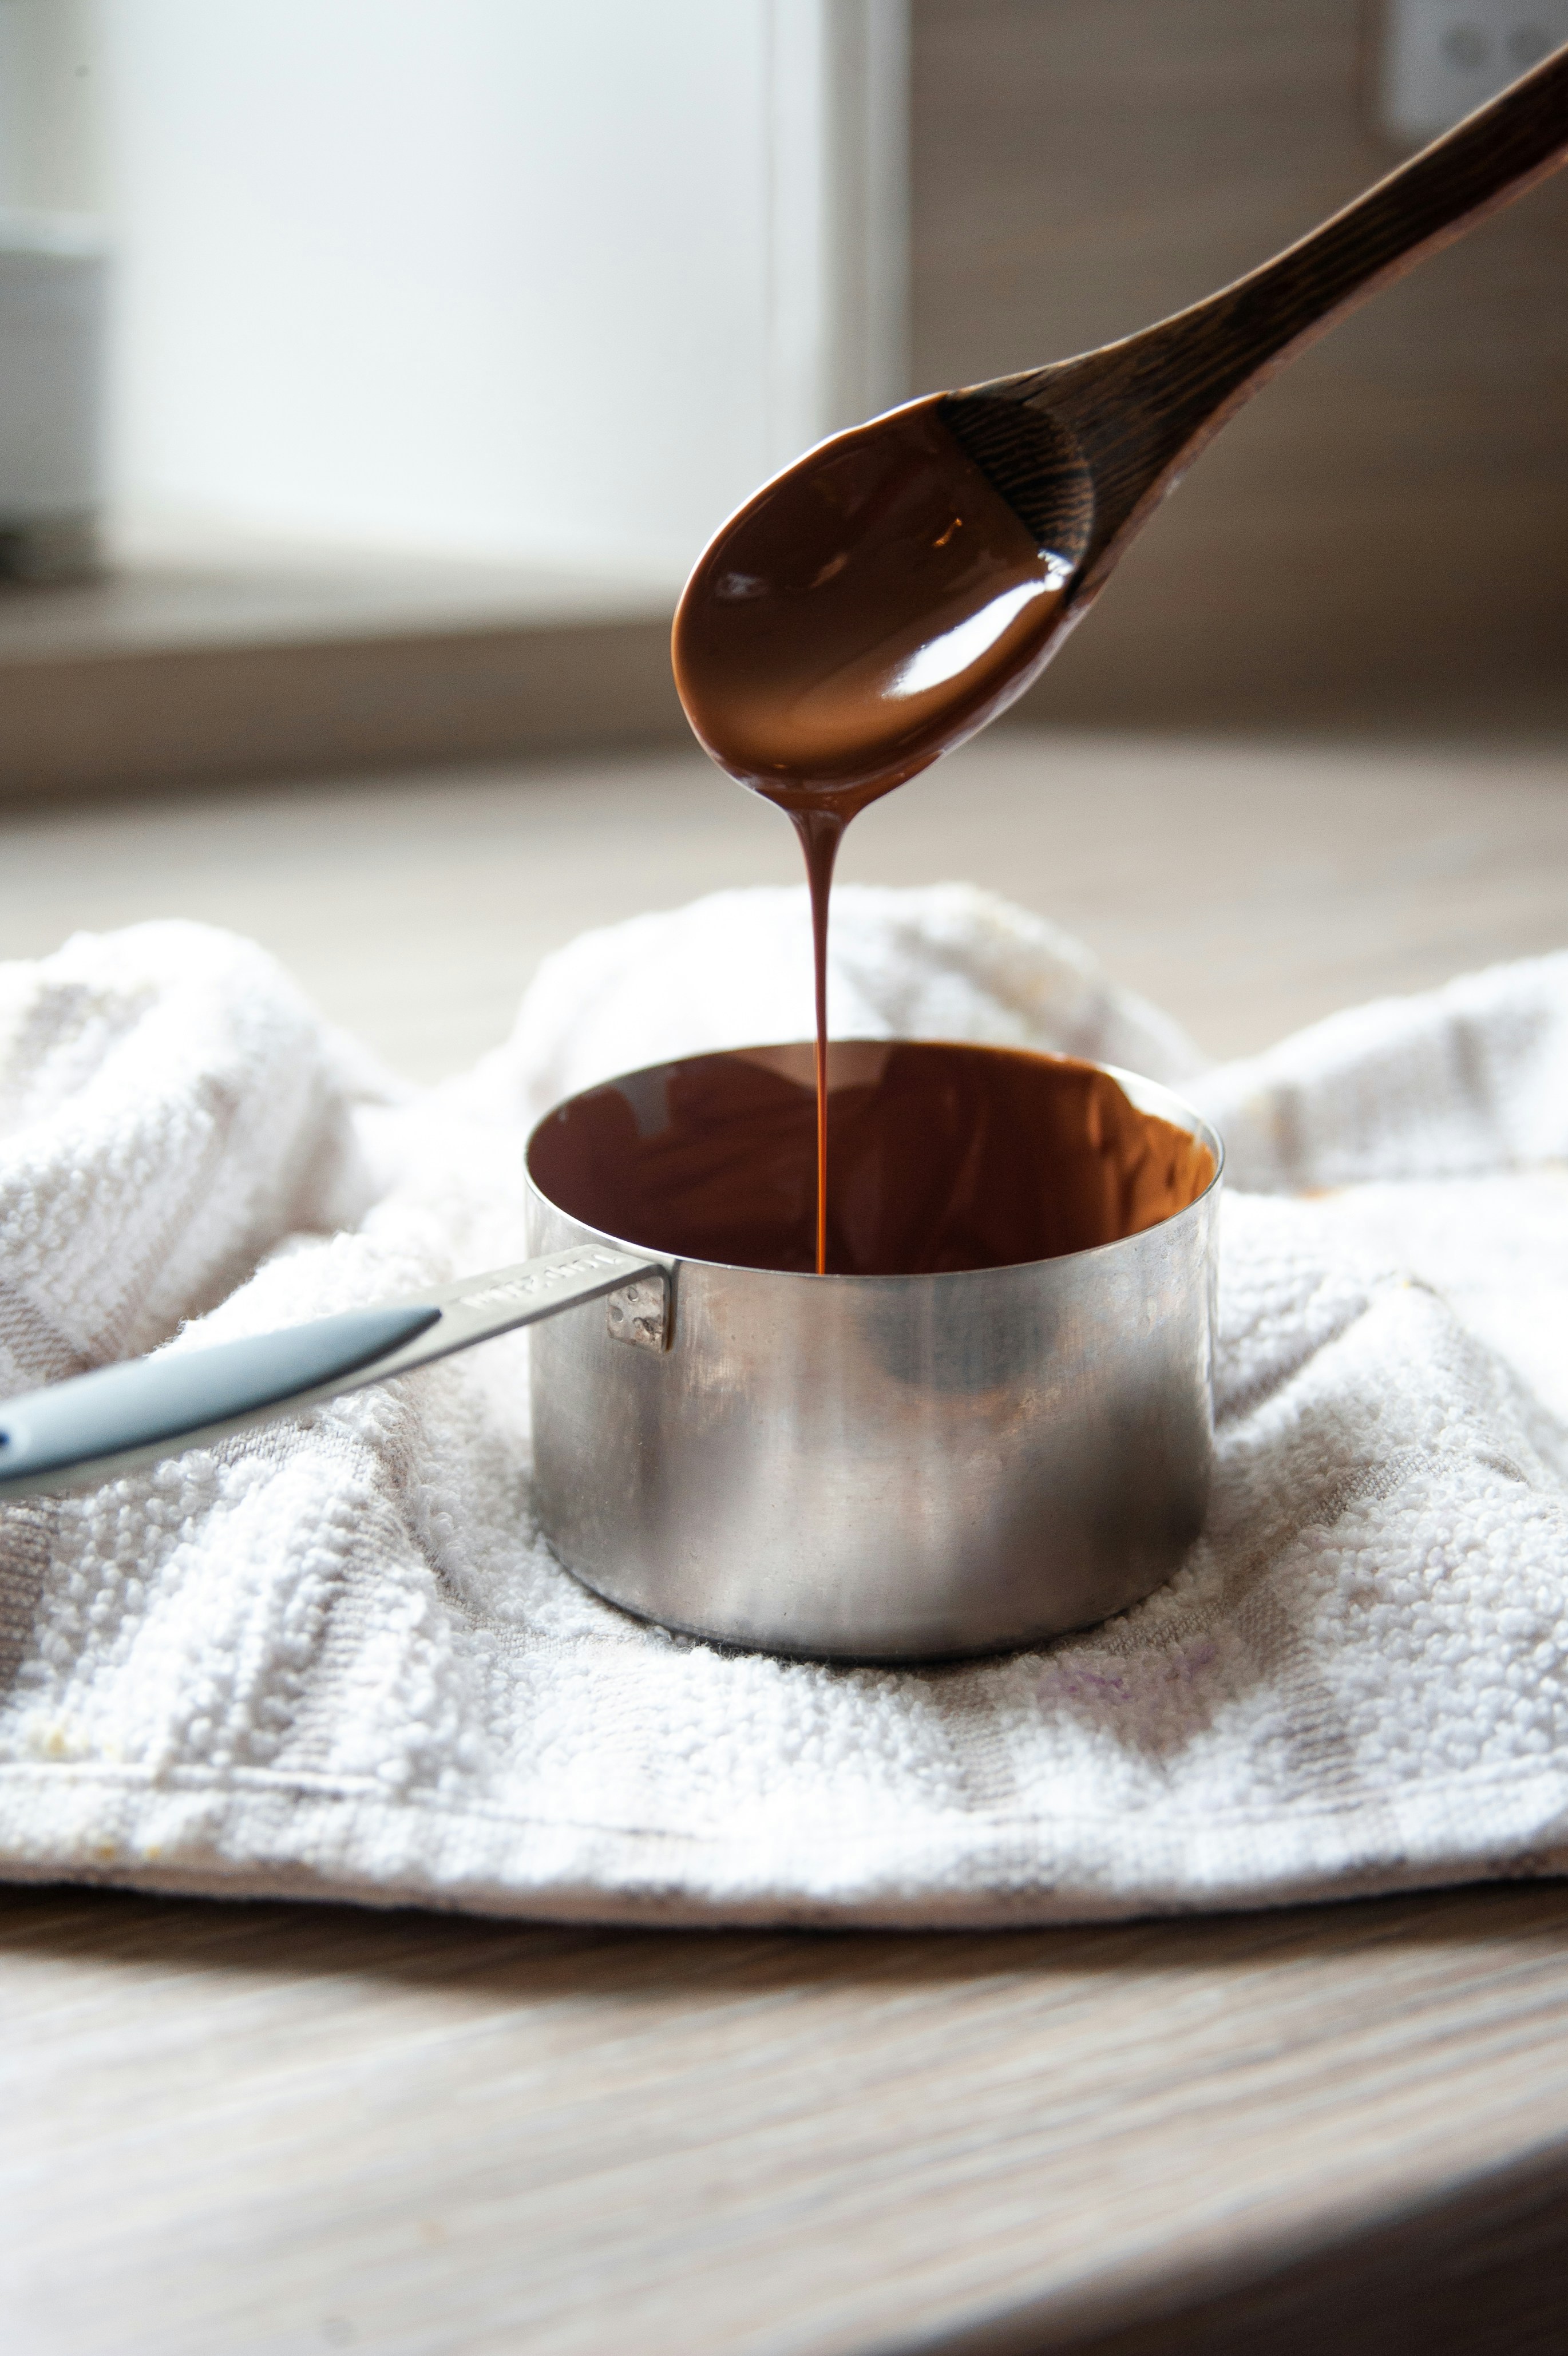
Lemon Curd
I get through jars and jars of lemon curd so I decided to try out some recipes and start making my own.
This is a combination of the best, giving me the ideal consistency and just the right amount of zestiness.
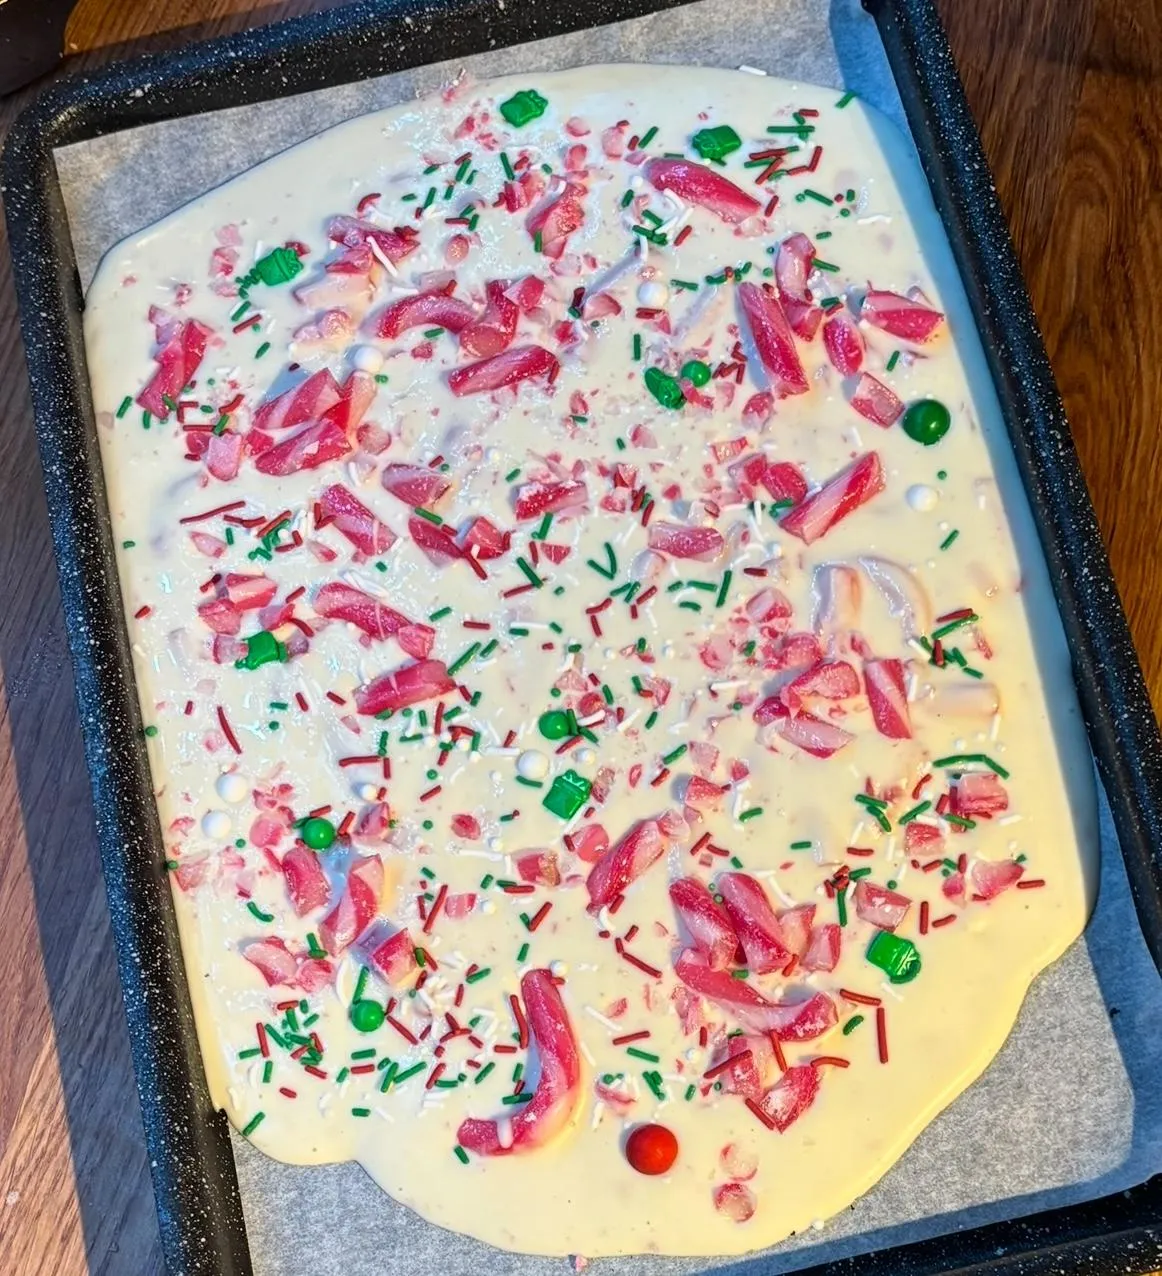
Peppermint Bark
Popular in North American for years, peppermint bark is becoming mainstream here. Its easy to make and tastes like Christmas. Here's how:
You will need:
400g white chocolate
1/4 teaspoon peppermint extract
one box of candy canes
some festive sprinkles
Melt the chocolate in short bursts in the microwave - total around 2 minutes - or over boiling water - be careful not to let the water touch the chocolate.
Stir the peppermint extract into the melted chocolate.
Place the candy canes in a ziplock bag and smash into various sized small pieces with a rolling pin.
Stir half of the candy canes into the melted chocolate.
Line a small baking tray with baking parchment and pour the melted chocolate mixture out.
Sprinkle the remaining candy canes onto the chocolate.
Decorate with additional festive sprinkles.
Leave in a cool place to set, or in the fridge if you like.
When hard, pick up the whole piece and snap into smaller shards.
Peppermint bark is great for decorating cupcakes, popping into a jar for a gift, or just snacking on. It is simple to make and much cheaper than buying ready made.
Enjoy x

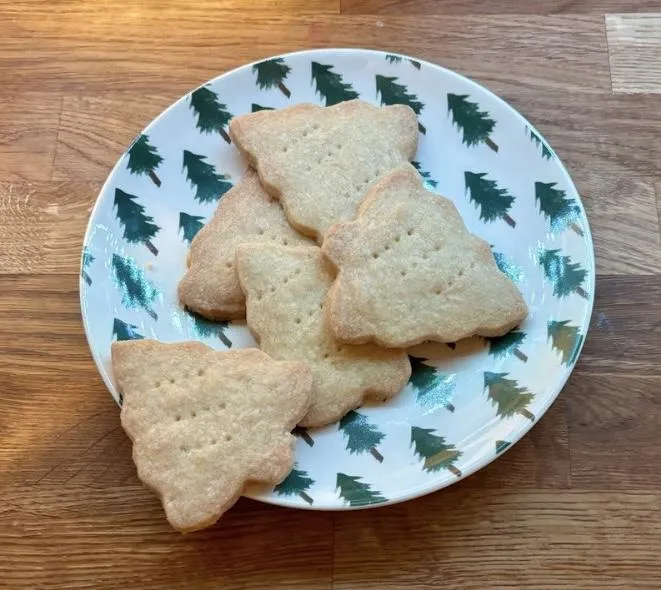
Shortbread
Ingredients
100g Plain Flour
70g Butter
1/4 Tablespoon Salt
30g Caster Sugar
Method
Preheat the oven to 160 degrees C (140 degrees fan) or Gas Mark 3
Line a baking sheet
Put flour and salt into mixing bowl.
Add butter then using fingertips, rub the butter into the flour and salt until it resembles breadcrumbs.
Add sugar and mix in.
Using your hand, bring the mixture together until a dough is formed.
On a lightly floured surface, roll dough out to 1/4" thick.
Cut dough into chosen shape and place on tray. Prick with a fork
Bake in the oven for 15-20 minutes or until golden brown.
Place on a cooling rack.
Christmas wouldn't be the same without a little tartan tin of shortbread.
But how about if you bought an empty tin and made your own shortbread and gifted it to friends or family - how gorgeous would that be.is is a Paragraph Font
This is a Paragraph Font
Ingredients
225g Self Raisin Flour
225g Oats
225g Butter
2 Tablespoons Golden Syrup
175g Golden Caster Sugar
Optional - chocolate chips, chopped nuts or dried fruit
Method
Preheat the oven to 200 degrees C (180 degrees fan) or Gas Mark 4
Grease and line a tin - use one that's something like 11" x 7"
Melt the butter and syrup over a low heat.
Gently stir in the dry ingredients.
Press into the tin.
Bake in the oven for 25 minutes or until golden brown.
Score into squares whilst warm.
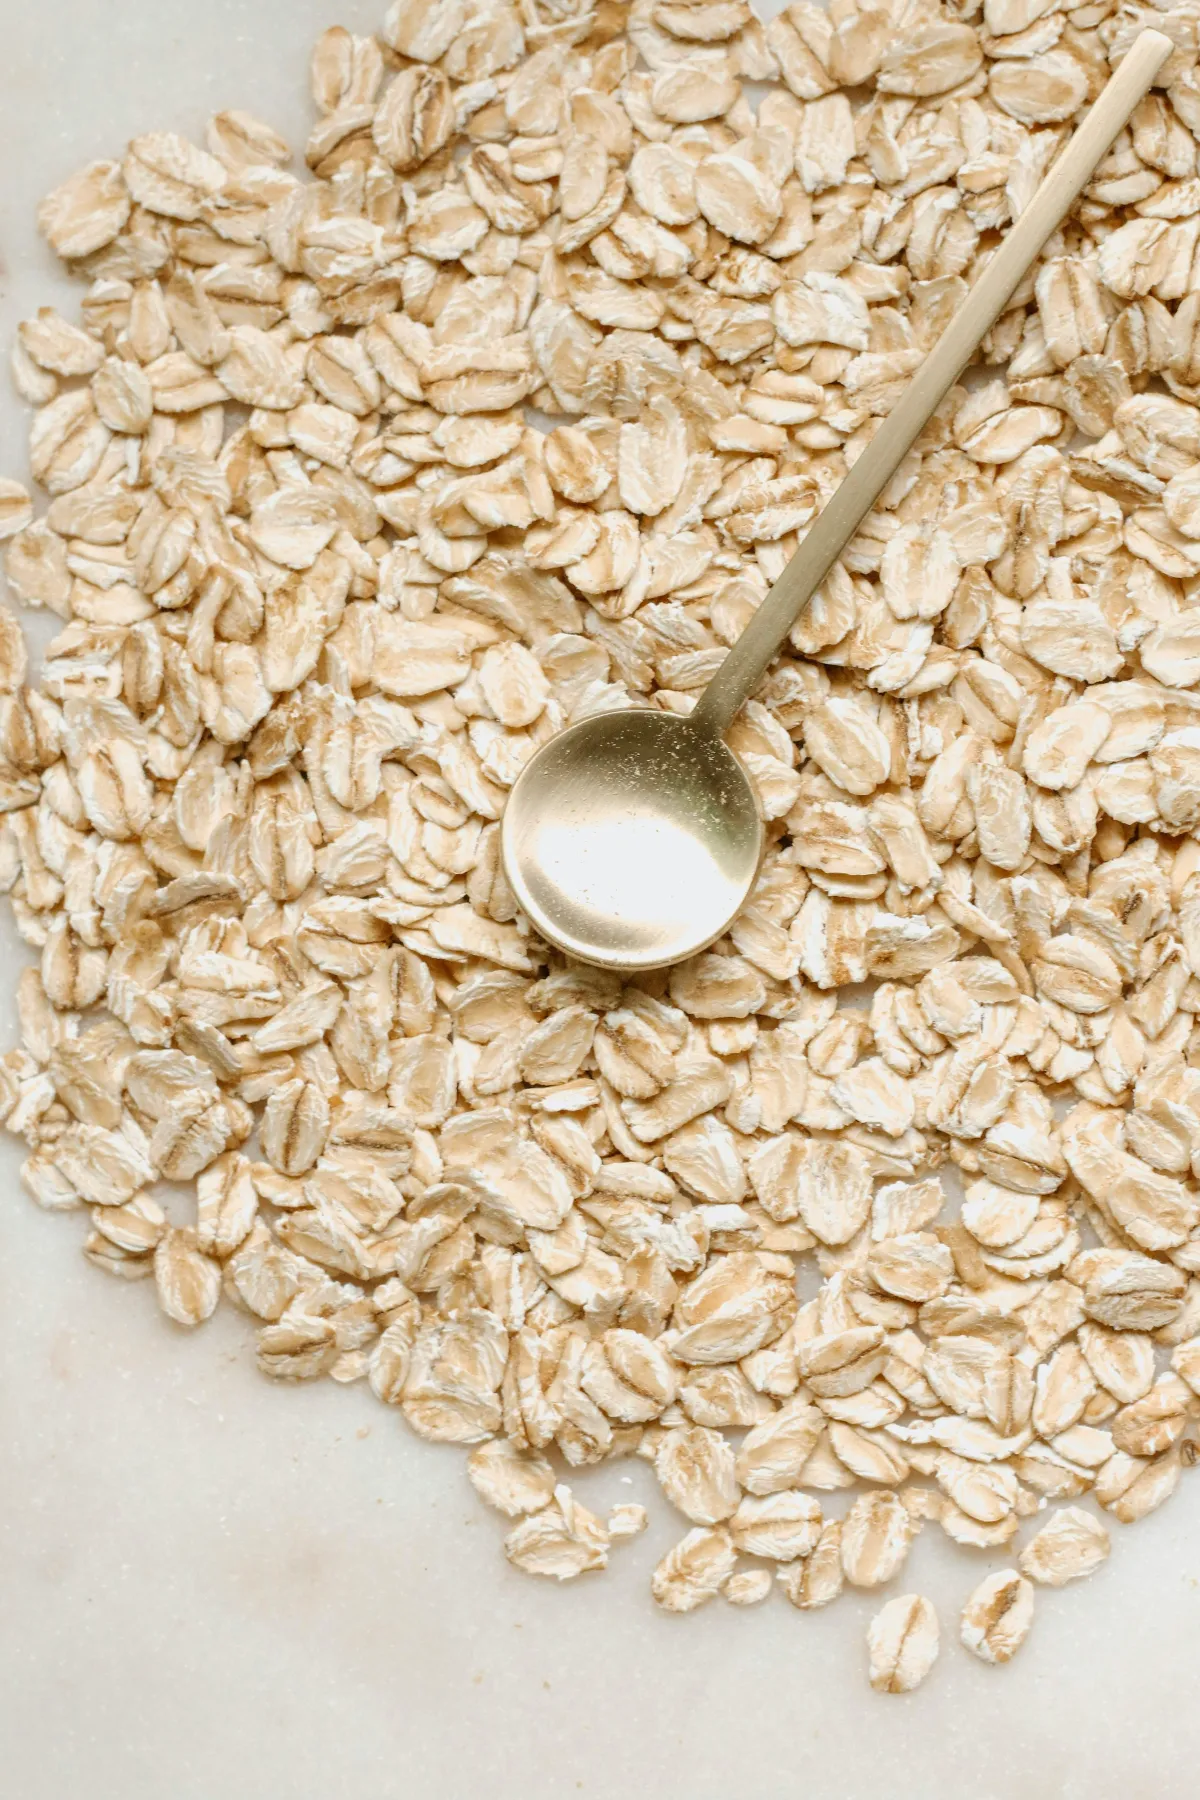
Flapjacks
There’s something about flapjacks that tends to bring back memories; maybe to a school kitchen, a family tin on the counter, or that first warm bite when they’re still just a little too soft to hold properly.
This is one of those recipes that doesn’t ask much of you. It’s simple, steady, and quietly comforting to make.